Jarzey
-
Posts
95 -
Joined
-
Last visited
Content Type
Profiles
Downloads
Forums
Events
Gallery
Everything posted by Jarzey
-
Just edit your first post and copy-paste the wiki section. You don't need any permission since it is on a wiki; therefore editable and able to be redistributed by anyone as long it complies with the general rules. If for any obscure reason you need someone to grant any kind of permission: since I am the original author of the article, you are henceforth authorized to post the aforementioned list as reference material for use in the Renegade X forums (still, I don't have any kind of copyright over what I wrote on the wiki, it belongs to the CCAS as mentioned below).
-
The veterancy reference chart has been removed from the veterancy article as requested. The chart is now located on my wiki user-page for the time being.
-
Done. I have updated each individual infantry/vehicle/weapon page with their respective veterancy bonus values.
-
Done with the article on Veterancy. As bonus, I made a reference chart showing how veterancy ranks affect infantry and vehicles. Since the data was collected from in-game, it only shows armor and clip/magazine values for the time being. http://renx.wiki/wiki/Veterancy
-
(Courtesy of Gliven)Around 2:35-2:45 (or seconds before Jessica says "Fuck you Jarzey >:@"): I really wonder how was the TS chatter in Nod team in that precise moment.....
-
Following the issues that occurred during this PUG, here is a reminder about the PUG rules (from the PUG rules TeamSpeak page, with some additional information): Welcome to the official Renegade X Weekly PUG! Games start in: https://countingdownto.com/countdown/re ... down-clock Listen to your Captain(s), and be a team player, the goal for the PUGs is to encourage amazing teamwork that would otherwise not be easily seen in a public server. We're all here to have fun. Anybody is welcome to join, but it is still highly recommended that you at least have basic knowledge of the game mechanics before you hop in. Basically, play around in public games first for a while before joining this. PUGs will typically last for about 2-3 hours long (sometimes longer), normally within 3-5 games. The losing team will pick the map for the next game after the current game is finished. Do not vote in the map selection if you are on the winning team. If teams are considerably imbalanced and both commanders agree, a team-scramble will take place. Consistent violations of these rules will result in your dismissal and a temporary ban from future pugs: *Do not change your name during the pug. *Albeit not obligatory, it is recommended that your in-game name matches the same one as your TeamSpeak name. *Do not change teams unless told so. *If you need leave before a pug officially ends, you must notify a CT moderator before the pug starts. *If you leave because of an in-game bug (sound bug for example), computer overheating, blackout, etc, try to rejoin asap. If you can't, make sure you inform a mod what happened anytime after the pug or post on the forums. *Do not ignore your commander's direct orders. *Do not remain silent. If your commander asks you a question, answer back. Usually, an "affirmative" will suffice. *If your commander orders you to not plant solo nukes, and you disregard the order and do it anyways, you will get kicked. *You must notify your team if you have to go AFK. Going AFK without notice will potentially result in a kick and somebody else taking your spot. *Excessive gloating/whining/retardation in all-chat/team-chat is not allowed. If you have any complaints, PM a moderator in-game. *Do not give away the PUG password to somebody who is not on this TeamSpeak. You and your friend will be banned immediately. *You must have your headphones/speakers unmuted. PUG Tips: *When picking a leader, remember that the best commanders are the ones that have a mic and are willing to use it, and they are also one of your team's best all-around players. *Don't be discouraged from a loss, instead of groaning about it start talking about strategies for the next game. *Please don't lock your vehicles, this is a PUG, it does more harm than good. *The PUG is your opportunity to participate in 20-man rushes. *Being loud tends to make people listen to you more (albeit prolonged screaming information non relevant to the battlefield will be seen as an act of retardation and it will be dealt accordingly). *Most importantly, have fun, it is just a game.
-
Recap of the PUG (plagiarizing Quincy's style without any remorse): Snow GDI successfully defends initial flame trooper rush by Nod. After that, both team push forth and back, along with several unsuccessful rushes, including: GDI pushing Meds to Air, and Nod rushing LCGs + Dozas to WF. Moments later HON is destroyed by a sneaking hottie coupled with other GDI players. Nod swiftly replies with a large chem rush which takes down the WF, and Bar is finished by a tech who sneaked in while the chem rush was taking place. Volcano Both teams go towards Harvies and tunnels at the beginning as usual. Vehicle warfare follows, with arties pounding and meds repelling. The turning point of this match is when a tech brings down Bar, made easier by GDI supposedly dealing with overmining issues. After that, stank rush destroys GDI PP. GDI, after a unsucessful Med rush, organizes a grenadier rush and rocket rush; both fail to produce any result. In the end, flame tanks raze WF and Ref to the ground. Walls Classic start with each team going toward each other's Harvie. Nod saved for Apaches and took control of the plateau with Raves for most of the match. GDI tried plenty of rushes, ranging from Chinooks, APCs, and a large Orca rush; however, all of them were called out and dealt accordingly. Nod answers by planting a decoy nuke to attract hotties away from Bar, which is destroyed by a large Apache force while the nuke is being disarmed. After some few failed rushes, including a large APC rush, GDI surrendered. Goldrush Massive McFarland rush by GDI brings down HON and PP. In the meantime, massive flame trooper rush to AGT by Nod is defeated by a single engi and a soldier. A single arty harasses GDI Ref for a while, but fails to break its armor. Following up, a hottie sneaks and blows Air up; Nod calls for reinforcements, summoning large amount of bots to fight for them. However, without infantry and vehicles, they are unable to stop a Med rush by GDI that brings down the remaining Obi and Ref. 4 matches in total; 3-1 for Team Jeff; around 13-15 players for each team.
-
There is also a similar glitch that happens when you are a SBH with less than 50 health and therefore not stealth: if you call an Airstrike, after the waiting animation is complete, your stealth capabilities will work again.
-
It is best to always have at least one member defending/camping, no matter the circumstances.
-
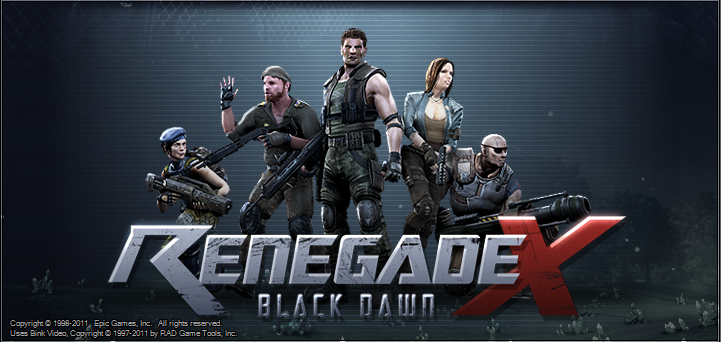
Can you possibly re-upload your Black Dawn walkthrough videos (if you still have them)? They made for good viewing material for the Black Dawn playthrough guide on the wiki (and on the forums). Thanks in advance.
-
Black Dawn is kind of short, and it does not really need a guide for it. Still, I wrote one when I wrote the article for the wiki (note that the guide is the same one from the wiki minus the descriptions of the cutscenes). Further information about Black Dawn is avaliable on the Renegade X wiki page: http://renx.wiki/wiki/Black_Dawn Black Dawn can be downloaded from the downloads page: http://renegade-x.com/download.php. Note that Black Dawn is separated from Renegade X, therefore it has its own UDK.exe application. Campaign Walkthrough Objective 0: Operation Black Dawn As soon the Hovercrafts approach the shore, everyone will start firing. This level is more of an introductory one, since you are not required to do anything, especially considering that you cannot move. Just wait for the Hovercraft to reach the shore and the mission will be accomplished. You may take out your Sniper Rifle and try to snipe some enemy soldiers (press N to switch to nightvision scope), but it is not really necessary. Objective 1: Invasion When the mission begins, you want to avoid being in the crossfire; in order to do that, go towards the direction indicated by the green objective marker, which is to your left. After going up, you will reach the upper plateau which hosts the Nod shore Turrets. Take care of the enemy soldiers and destroy the first Turret by planting C4 on it (press E when you are near it). You can clear the soldiers in the first bunker and swap weapons with the ones on the table, but this is optional. After the first Turret is down, move up and destroy the second one as well, while mopping up the enemy resistance you may encounter. After the two Turrets are down, proceed towards the second bunker and clear any opposition in there. You have to go inside this one since a crashed Chinook is blocking the way. The mission will be accomplished after you exit from the other side of the bunker. Objective 2: Sand in my Boots Make your way towards the tower, and you will find enemy soldiers behind the bunkers; kill them directly or flank their position if you think you will get too much damage from them. There are some explosive barrels scattered around, which you can use to your advantage if you destroy them while enemies are nearby; just make sure they do not blow them up when you are close, otherwise you will take a lot of damage. There is also a couple of Buggies on the right and eventually a Chinook will land and bring reinforcements, but those are engaged in a brawl with other GDI forces and the latter can easily take care of the former. After clearing all the opposition around, climb the stairs towards the tower. A cutscene will start and the mission will be accomplished when going towards the top of the tower. Objective 3: Not according to Plan Make you way towards the green marker. On the way, a Humvee will be blasted apart from a rocket, and the impact will knock down you: this is purely a cutscene; you will not take any damage from the fall. After getting back up, move inside the path between the trees, kill any enemy soldier in the way, and destroy the Gun Emplacement near the SAM Site. Note that if you flank the emplacement and kill the operator from behind, you can use it against Nod forces (press E to use it), but it is easier just to blast the emplacement from afar. SAM Sites can be destroyed by placing C4 on them, akin to the Turrets in the second mission. After the first is destroyed, proceed to the second one. You may seek cover behind the trees against enemy gunfire. After the second is destroyed, proceed towards the green marker up the hill and near another tower, while eliminating any opposition that may be around. The mission will be accomplished when you reach the destination. An A-10 Warthog will destroy the shore Turrets nearby. Objective 4: Baby Sitter Before jumping inside the Medium Tank, you may want to check the tables around the camp since they have weapons on them; you may switch weapons with the G button, but you can only carry two at time. After you feel comfortable with your armament, is time to enter inside the tank. A Humvee and another Medium Tank will assist you, but your forces are outnumbered and they will not last long against two Buggies and four Light Tanks. Focus on the tanks first, especially those already damaged by your allied vehicles; but you have to be quick or the Mobile Rocket Launcher Systems will advance too far from you. Do not worry if you lose your tank, your Tactical Rifle or Flamethrower can deal with tanks just fine. After you clear the Nod forces, rendezvous with the Mobile Rocket Launcher Systems and destroy any opposition in front of them, starting from another two Buggies that will rush towards them; then kill the soldiers that are firing rockets first than the ones that are firing guns. There is also an enemy Gun Emplacement on top of the tower. Objective 5: Twisted Metal A Chinook will deliver a new Medium Tank for you to drive. Before hopping in, you might want to check the tables to find weapons that suit you, albeit in this mission it is not really necessary, since you will not be hopping out from your tank. After you are inside the tank, drive forward until you reach the GDI battalion that requested for support. Assist them by firing at the incoming Nod forces. They keep spawning, so you have to hold the line. After a specific period of time, three A-10 Warthog will perform a strafing run and clear all the Nod forces in front of you, and the mission will be accomplished. Objective 6: Flying Coffins This is considered the most difficult mission in the campaign. Your objective is to hold the line (against Nod soldiers this time) and protect the Mobile Rocket Launcher Systems. There are two tables with various weapons and pickups that can prove useful, albeit your main weapon will be the Gun Emplacement mounted on the blockade. Mow down every soldier that tries to overtake your position; make sure they do not cross the line (in this case the beaten path) since the emplacement cannot rotate around at 360 degrees. Lastly, prioritize soldiers armed with rockets, since they can do serious damage to Mobile Rocket Launcher Systems. In between the second and the third wave, two Buggies will appear from the flank and harass the Mobile Rocket Launcher Systems. Quickly hop off from the emplacement to destroy them before they can do severe damage; Chaingun or Tactical Rifle will make short work of them. In the fourth wave, this time two APCs will appear from the flank and harass the Mobile Rocket Launcher Systems. Same deal as for the Buggies, hop off and destroy them before they cause too much trouble; Rocket Launcher or Tactical Rifle are able to deal with them. In the fifth and last wave, a couple of Apache Helicopters will appear, so look towards the sky to spot them. Gun them down with the emplacement before they can cause too much damage, then finish all the remaining Nod forces. After the timer reaches zero, the mission will be accomplished. Objective 7: Time to Rock 'n Roll Same deal as several levels before, there are weapons on the tables that you might want to check before hopping into the Mammoth. After done with such, make your way towards the other shore. It is not advised to cut the road via shortcuts, since it may trigger the "Return to Battlefield" countdown, which will kill you if you do not return in the battlefield in time. Wipe out enemy resistance along the way. As you reach the shore, several Apaches will fly towards the GDI forces, while some may start firing on you. Shoot your cannons only when Apaches are still to maximize chances to hit them; use lock-on rockets to strike at them while they are moving. Prioritize Nod vehicles that are firing on you first before shooting on those focused against the GDI forces. After clearing up the assault force of mostly Apaches and Light Tanks, another Nod battalion composed by Apaches and four Mobile Artilleries will move forward. To accomplish the mission, you are only required to destroy the Artilleries. Should you lose your Mammoth, there is a vacant Medium Tank on the shore with the GDI forces that you can drive. Objective 8: Roasted and Toasted Get inside your Mammoth by going towards it. Take out any enemy opposition, prioritizing on enemies that are firing against you. Use rockets against moving Apaches, and save your cannon shots when they are still. When you arrive to the Hand of Nod, leave your Mammoth and enter inside it. Prepare to engage Nod infantry; this is the only time to make use of the Volt rifle. You can either take the left or right path, it does not matter much since they both lead towards the same spot. Traverse the corridors, zapping any Nod soldier in the way. Like in the third mission, there are some explosive barrels scattered around the halls, which you can destroy to blow up nearby enemies; just make sure they do not blow them up when you are close, otherwise you will take a lot of damage. Next, go down the ramp and take a right turn. Clear all the enemy resistance in there and pick up the red-hologram looking security card (with E button). There are also weapons on the tables you might want to switch, especially the Flamethrower: strangely, in Black Dawn, it deals more damage per second than the Volt rifle, albeit having less range than the latter. With the security card, go back to the ramp and take a left turn instead: now the door that was locked before will open up. Mop up any enemy you encounter in there. The mission will be accomplished when you reach the large blast doors on the back side of the Hand of Nod. Objective 9: Desperate Measures There is a time limit, but is not that strict. Begin by moving towards the wall that has a red holographic indicator and place C4 on it (with E button); after blowing it up, make your way to the AC-130 Cargo Plane docked on the Airstrip. Take down anyone who decides to stand in your way, but do not waste too much time in killing every single Nod soldier around. Reach the back of the plane and enter into its cargo hold (you have to jump to reach the ramp) to steal a Nod APC. After you obtain the APC, drive it towards the direction indicated by the green marker. You may kill Nod soldiers in the way by ramming into them or shooting at them. A couple of Buggies will attempt to block your way; either circumvent or destroy them. After crossing a Tiberium field, there will be one last Nod blockade settled before a bridge, and they will have the support of a Chinook and a couple of Apaches, but you do not have to worry about them: three A-10 Warthog will strafe by and shot down the helicopters without you needing to do anything. Cross the bridge, take down any obstacle, be it a Buggy or Nod infantry, and the mission will be accomplished when you arrive on the other side of the bridge. After you have accomplished the final mission, credits will roll. Congratulations, you have beaten Renegade X: Operation Black Dawn.
-
I am already doing such on the wiki. (http://renx.wiki/wiki/Guides_and_Tips). Still, you are welcome to attach the other guides in this post.
-
No offense taken. I am in no position to say that to you. The privilege is exclusive to Yosh and B0ng only. (sarcasm)
-
I know right? Seems like others just vanished and got buried under lines of text... Well, people are busy with their lives, and if they have free time to dedicate to RenX, I think they would play the game rather than write about the game instead. Not a big deal for me, given that RenX gameplay is made of few core concepts (especially compared to those online games which introduce new stuff to the game every version or so), and that I actually enjoy writing, I have no qualms in writing the articles just by myself. On the other hand, articles about server and development, such as Jupiterbot and RCON stuff, well... I have no experience in coding or knowledge of the SDK, therefore I probably will not contribute in writing those articles.
-
Looking through GitHub files should be good enough to get me started. (Worst situation, I will write the article for the weapons first and compile their damage sheets later). Thanks for the tip. Edit: After a quick reading of the file, I should be able to get the damage values from Rx_Projectile and the damage multipliers from Rx_DmgType.
-
Some things I wish to point out in this recent PUG: In Goldrush, I got Tech early by money crate + suicide. From the perspective of a "new" player (not new to the game but to PUGs), when I started mining I was promptly called "asshole" for 2 reasons I believe: 1: I was mining, 3 mines per door, adjacent to each other to prevent "down to 5% first and then sweep em all" phenomena. Maybe people are used to see the 3 mines in a row with some distance between each other. I followed Quincy's tip, who is pretty informed about the subject. 2: I was not speaking while I was mining. I did not know you had to speak while you mine; if there is such rule, then I take the blame. I did not speak because people will get confused with too much chatter. Apparently someone known as Tony did not like it at all and issued a vote ban against me. Still, others defended (Agent was one of them I think) me, and I am grateful for that. I believe Canucck also made a good point here: In the 4th match, Whiteout, I got blamed (words were "Jarzey I hate you") when I supposedly gave away the position of a potential allied infiltrator, and that might be true. Still, acknowledging that Minji was patrolling steadily with an Apache in that match, and that she knows all the sneaky routes, I hardly believe that the allied Hotwire would have made it through, even if I was not following behind. Lastly, I do not like people who brag around in chat. I believe not many do, and that's why there is such rule on the PUG TS channel: "Please keep all-chat friendly, excessive gloating/saltiness/annoying will be muted" Now, I have no idea when the gloating gets excessive, but in my opinion, the player DCG909 (nothing personal against you) could have kept to himself instead of voicing his achievements in all-chat. Call me a wimp or something like "oh, I hurt your feelings, bitch"; go ahead, I do not give a damn. I only want to point out and possibly remind why that line is written under the PUG rules. Of course, no personal offense taken, but if PUGs should be user-friendly and open to new players, then I believe insulting them is not a good way to welcome the newcomer. On the other hand, if they are supposed to be competitive matches between friends, then you may just call me an asshole, consider this as a salty rant, and disregard everything I have said.
-
Articles about Vehicles, Buildings, and Infantry, are mostly, if not, complete by now. For Maps, I will await the new map releases before rewriting some of the articles. Right now, in order to get started on the Weapons articles, it would be handy for me to know the base damage of each weapon (along with other technical stuff). I believe there is a damage chart compiled somewhere by the developers. If for any reason the damage chart cannot be displayed to me or the public, or if such chart was never actually complied, I can calculate damage towards vehicles and building by myself, but I require a volunteer in order to calculate damage values against infantry, especially accounting factors such as their type of armor, headshot multipliers, et cetera.