Search the Community
Showing results for tags 'guide'.
Found 4 results
-
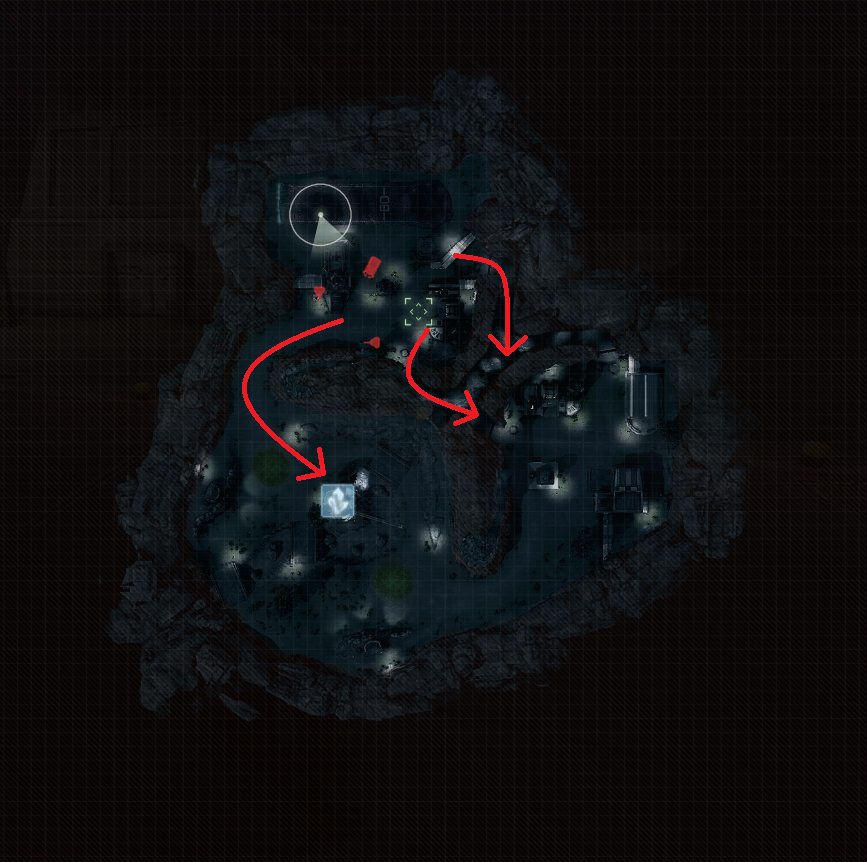
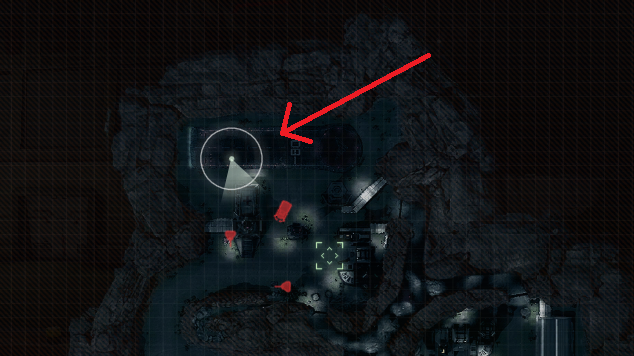
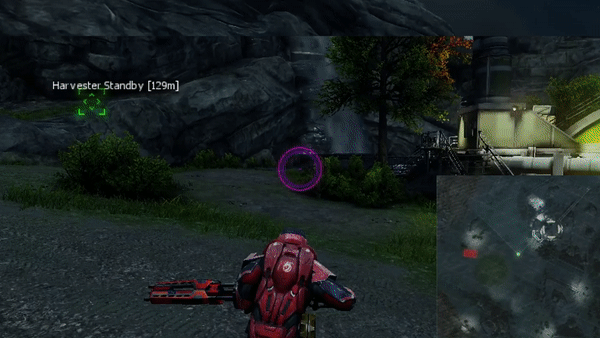
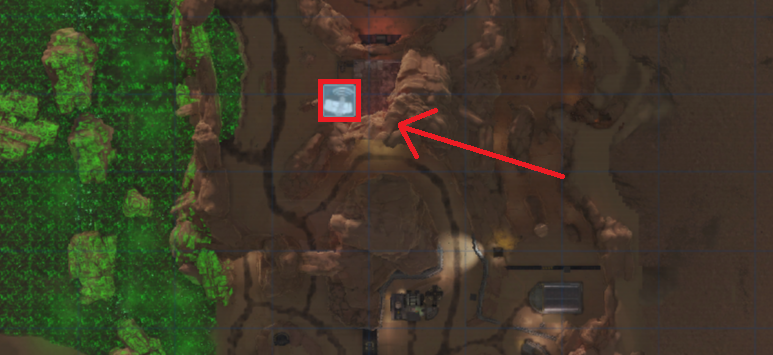
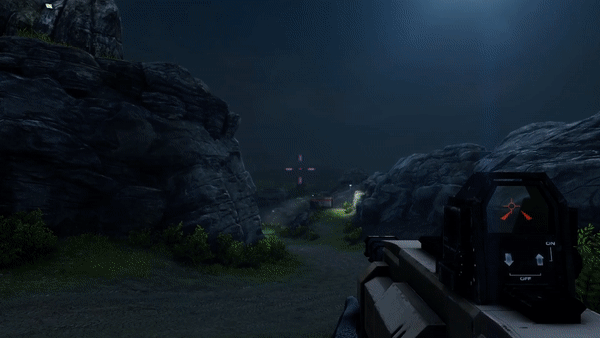
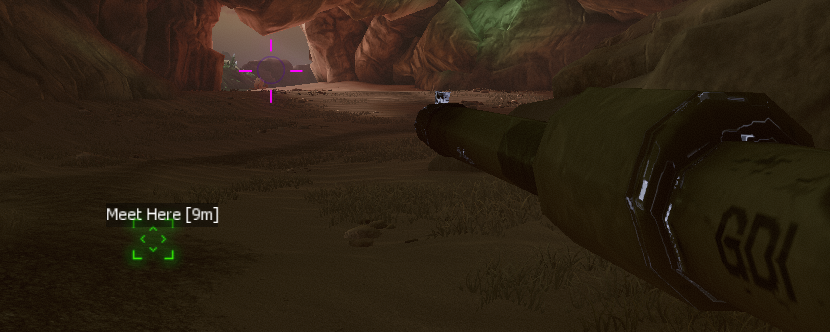
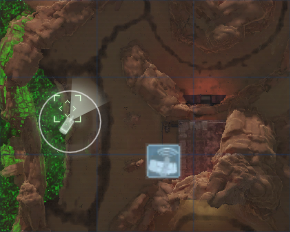
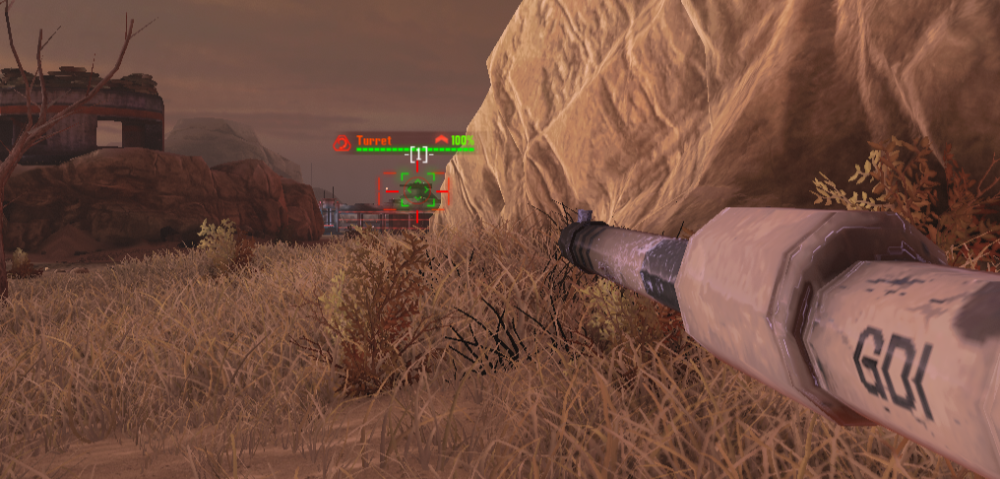
WELCOME BACK, COMMANDER In today's topic, I'll be going over the complete process of how to command in a PUG and providing you general tips on how to command effectively and thoroughly. This guide is intended for players who are new to commanding and are willingly to step up to the role. We'll go step-by-step on every detail we have to offer. Lets dive straight to the point, shall we? Topic 1 ——— General Rule of Thumb ——— 1. Use Your Map! 1. Using your map is the greatest tool you can have! This is by far the best way to get critical information on the battlefield, and see where enemies are attacking. By pressing M on your keyboard (by default settings), you will open up the big map and see the play areas the map offers. On the left side of the map, you can see the info box containing character classes and vehicles. This is incredibly useful to see what your teammates are assigned to/playing as. Image from in-game Renegade X 2. The dot with the ping circle outline represents you, the player. Nod players will be presented as a red dot, and GDI players will be presented as a gold/yellowish dot. You can also see a range of other identifiers such as base defenses (Guard Towers, Nod Turrets, etc), harvesters, player vehicles, and neutral structures (Silo, Communication Center, etc). Image from in-game Renegade X Important note for old and new players: since <<Patch 5.71.534>>, players can no longer see neutral vehicles in the enemy base. This was incredibly frustrating since players could predict a rush of APCs or tanks. If they're Q spotted or found by a Radar Scan/Spy Plane, they will show on the map however. 2. Which Target! 1. Killing the Weapons Factory/Airstrip or Barracks/Hand of Nod isn't the only way to cripple the enemy. Killing the Power Plant will slow down enemy production as vehicles and character classes are now expensive, and will put the Advanced Base Defenses (AGT/Obelisk) offline. ——— ⚠️ ——— However, never let your guard down or be too comfortable because you destroyed the Weapons Factory/Airstrip or Barracks/Hand of Nod. The enemy will always have a chance to rush you at any moment! Just because you lost your vehicle production or Refinery doesn't mean it's over. Never surrender when you still have options! Comebacks do exist! You just got to believe! ——— ⚠️ ——— Just be aware that now the Power Plant is destroyed, and the Advanced Base Defense isn't, don't destroy it! You'll be team hampering yourself and feed the enemy more amounts of CP (Commander Points)! When you lose a building, your CP tick increases allowing you to rush more often. High Economy Maps ——— 💡 ——— Destroying the enemy Refinery early game can be a huge blow and costly for the enemy as they no longer have a steady income of credits to buy vehicles or characters. Destroying the enemy Refinery late game can [possibly] be futile as the enemy team is now rich with credits. Playing the long game, however, can have it's pros and cons. ——— 💡 ——— Maps like Crash Site and Reservoir have a Power Plant, but no Advanced Base Defenses. By mid-to-late game, you should have a high amount of credits which means if the enemy destroys your Power Plant mid-to-late game, you should thank them. You now have a increase rate of CP (Commander Points) which you can use in rushes. Image from in-game Renegade X 2. Last but not least: destroy the enemy harvester! It is often very important early game to destroy the enemy harvester as a early game objective. Destroying the harvester will mark which team will succeed. Maps like Field X, Goldrush, and Mesa are good examples. If GDI's harvester is destroyed, they won't be able to push out Medium Tanks as quickly early game to hold the field. If both teams lose their harvester, Nod will have the upper hand as they're vehicles are faster and cheaper than GDI ones. ——— 💡 ——— If you're GDI and you manage to lose harvester early game on Field X, for example, tell your team to grab Gunners/Rocket Soliders to oppress early Nod vehicles such as Artys and Light Tanks. GDI MRLS are usually a bad way to take field early as they are not as good as Nod Artys. If you have confident and excellent tankers, then they are good to go on buying a MRLS. Don't forget to grab your dedicated repairs! 3. Support Powers! 1. Using support powers is a obvious must, especially when you need to Offensive Buff on the enemies Refinery. Don't be afraid to use [commander] support powers in the battlefield. If you know it's difficult to Q spot enemies, you can always drop a Radar Scan/Spy Plane in the battlefield or in their base. Using a Radar Scan/Spy Plane will waste 150 CP, but if your team is coordinated and able to kill the targets highlighted you'll get more CP than you did wasted. Don't get carried away and spend too much of it though. If you are going to Q spot or Radar Scan/Spy Plane, always call out your target and which target to hit! You're target will be numbered depending on how many you spotted. As a Commander, it is very important to always Q spot or your team won't know what to hit. Targets who are spotted are also going to appear on the map and mini-map! This goes back to the first point of Use Your Map! Most weaponry in-game doesn't allow you to Q spot targets very far. If you have Timed C4 or Remote C4 available in your inventory, switch over to that and you can Q spot far away than a common Assault Rifle or Laser Rifle. ——— 💡 ——— Communication Centers are also a good way to see where enemies are in your map. Maps such as Field X, Steppe, Darkside, Toxicity, and Outpost all contain a Communication Center that you can capture with a Repair Gun/Tool. Communication Centers are very useful for spotting rushes outside enemy territory so be sure to capture it to your advantage. Image from in-game Renegade X 2. Be careful using Cruise Missiles in-game as the enemy can shoot them down with a Rocket Soldier, Sydney/Raveshaw, or any vehicle if they have good aim. Most times, Sydneys and Raveshaws will be in the field to target the Cruise Missile with ease and without interruption. Cruise Missiles (depending on how you use it to your advantage) will 90% of the time fail feeding the enemy VP (Veteran Points) and waste of 800 CP for you. 10% of the time the enemy team will neglect, or too busy being focus, to shoot the Cruise Missile causing it to hit it's targets dealing massive damage to vehicles, one shotting infantry players and light armor vehicles while also giving you a crazy amount of CP and VP depending on your effectiveness and targets. ——— ⚠️ ——— Be aware of maps that contain Sam Sites/AA Towers as they can also shoot down Cruise Missiles, EMP Strikes, and Smoke Strikes. Some map examples include: Walls, Toxicity, Lakeside, and Whiteout (which is no longer in PUG rotation). 3. Using EMP Strikes on your enemies in tough situations in the field is nothing to be ashamed of, especially when their is abundant of vehicles. Even if the EMP Strike doesn't get any vehicles, it at least puts the enemy in a small panic causing them to fallback or push aggressively. However, don't spam it too much of it as it does cost 500 CP to use. Use it wisely! Then again, don’t underestimate Defensive Buffs. The EMP immunity is incredible for breaking past enemy anti-tank infantry. 4. All In or Nothing! 1. Every Commander always has a wild idea in their head that they think it will work in the start of the game. Meme Rushes or what most PUG players like to call Rule 7 is a gamble, a 50/50 chance it will work. If you believe your commander is making a strategic mistake, please do no hesitate to suggest a different strategy. But at the end of the day, they are the Commander so you must abide to their plan. ——— ⚠️ ——— Keep in mind, Meme Rushes are very risky and will likely fail in the start of the game. One team is going to have a very bad time so don't expect PUG Organizers/Moderators to re-balance the teams if it does or doesn't work out. 2. Always listen to the Commander and your team! Be a team player! Do not complain about the outcome as it doesn't help you or your team. Lowering your teams morale causes your team not to do well in the battlefield. Excessive whining or complaining will likely cause you to be muted or kicked from PUG by a PUG Organizer/Moderator. ——— ⚠️ ——— Lowering your teams morale will have negative consequences! Everyone will always have a different mood during pre-PUG. It's always best to keep your team in spirit and ensure the atmosphere is enjoyable for your team. Don't go overboard and start sh*ttalking the other team. Mental warfare can be a strategy to taunt the enemy team, but be respectful. Topic 2 ——— PRE-PUG ——— 1. Once you join the Waiting & Reserves voice channel in the public TA Discord server, PUG Organizer/Moderator will ask for a Commander who is willing to step up. Once you the Commander has stepped up- we'll move you down to the {redacted} channel where we'll then start our balancing. In the channel with PUG Organizer/Moderator, a coin toss (heads and tails) will determine who will get to pick first. The winner of the coin toss will get to pick first (obviously). As a Commander, you get to choose 3 picks if there is more than 40 players, or 2 picks if there is less than 40 players. In most cases, you'll get 3 picks since most people join late. ——— 💡 ——— Be wise about your picks! Choosing your friends is okay, but it's always best to choose players who are very good at their job. Of course, if your friend is very good at their job go ahead and choose them. 2. Once we balance you and your team, it is highly recommended you pick a dedicated Base Defender who is willing to, of course, base defend for you. The Base Defender is the person responsible (most times) for placing down Proxy Mines in buildings so sneakers won't sneak the buildings. You and your team have access to see the Mine Count on the left side of your screen (above your map) so you can call out mines if they go missing. Image from in-game Renegade X For more information about base defending, please refer to this guide here: n/a Topic 3 ——— EARLY GAME ——— 1. The game is starting and the map has been chosen. Before the match officially begins you have time to discuss with your team about your early game plan. This depends on the map and your teams spawn locations, but don't be afraid to call out individual players to do certain task. So for example on Field (low pop): Hand of Nod/Obelisk ---> Capture Tiberium Silo/Protect Harvester Airstrip/Refinery ---> Take the Infantry Tunnels Image from in-game Renegade X 2. Priority one for early game should be economy advantage so you must protect your harvester while also destroying theirs. If a Tiberium Silo is present in the map, also try to capture it. Depending on the map and your economy, organize and roll out types of AT/Tanks to contest the battlefield. The default for GDI is Medium Tanks/Gunners and for Nod it will be Artillery/Light Tanks/LCGs (Laser Chain Gunners). If GDI loses their harvester, Gunners will need to be called out or the team has to donate for early Medium Tanks. Don't forget your repairs! You can donate early after 3 minutes and 5 seconds. ——— 💡 ——— If you have Gunners/GDI Rockets rolling out, be sure to tell them to place AT Mines! AT Mines are very important as they stop and protect you from Stealth Tank rushes or any vehicle rushes in general. Image from in-game Renegade X ——— 💡 ——— If you control the economy, you control the game! Don't let the enemy team get a chance to breath or let them get a slight income of credits. But be careful, anything that gives you VP (veteran points) also gives you credits so make sure your team isn't feeding them. 3. When you look at your Overview Map (pressing M on your keyboard by default), it is your duty as the Commander to monitor the spread of your team. Ensure you have at least one player on every route so they can watch out for early Meme Rushes or infiltration catching you by surprise. If a player is requiring assistance on the Infantry Path as they know they can't handle it on their own, you need to tell your team to assist them. Same goes for the field if AT/Tanks need repairs or more firepower. Topic 4 ——— MID GAME ——— 1. The battlefield is harden and contested by both sides. Your primary focus is to gain field control for veteran points and economy, that way you and your team are stronger and ahead of the enemy team. Being passive is generally not a good idea (depending on the map), so being aggressive is what you want. You always want to keep the enemy team on their toes, and never time to think. Don't be too aggressive or suicidal with your vehicles, however, as you don't want to feed them Veteran Points and credits. Look at your map and identify weak spots. Have your team coordinate with you and get ready to push if you have to. 1. IF YOU HAVE FIELD CONTROL! 2. If you have complete field control, consider gathering your Infantry/Tanks to gather on you so you can buff all of them in. If your team is lost or confused where to gather, be sure to put a waypoint of "Meet Here" on the battlefield so players can identify where to go. You can identify where the waypoint is at by looking at the overview map or surveying your surroundings. Before you rush in, it is very important to call out your target! Tell your team which building to focus first! Don't forget to Q spot your target! Announce which buff you're going to use as well. Make sure that your team has enough of an economy/veteran points to retake the field afterwards. Image from in-game Renegade X To put waypoints as a Commander, on your keyboard press CRTL + C to open the Commander Menu. Then press 1: Mange Waypoints on your keyboard to access the waypoints given to you. Image from in-game Renegade X Waypoint on the map: Image from in-game Renegade X 2. IF YOU DON'T HAVE FIELD CONTROL! 3. If you completely lost field control, consider breaking out together with a Defensive Buff or defying the odds with a small player rush. Just be sure to have enough players to defend the base when you push out. Don't do infantry rushes when you know the enemy is right outside your base, especially when they're is a massive horde of tanks getting ready to destroy your base in the process. You will never win a base race with enemy vehicles outside your base. Remember, desperation is an advantage! Don't surrender when you still have options! If you know your team isn't communicating, or failing to hold a position, it's okay to move on to the next map. Topic 5 ——— LATE GAME ——— 1. Players are starting to hit Elite and the Heroic mark, and both sides are still contested in both the field and infantry path. Seems balanced (which I doubt), but one team has to come out on top. Both sides are getting tired, and their mental capacity is slowly wearing out. If you need to play the long game, then do so by farming Veteran Points to reach Heroic. Remember, you do more damage the higher rank you are. Attempt to do Rocket Rushes (as GDI or Nod) as they have excellent damage and hit target from far away the higher your veterancy is. Don't underestimate Heroic Rocket Rushes, they a very deadly and burst a building down very quickly if you're not careful or paying attention. 2. Repeat your orders! Hearing a single order is hard in a loud channel. Hearing the same order repeated 10 times is a lot easier. Keep going until you the game is over! It's not over until all buildings are dead or they surrendered. Don't get comfortable either! Just because they lost the Barracks/Hand of Nod doesn't mean it's over! As I said before, Rocket Rushes can and will be the end of you. PUG Islands Game 6/3/2023: Image from in-game Renegade X ——— CLOSING POINT ——— General Commanding Tips Don't be evil dictator, or demanding. Not everyone can hold a position for too long in the field or infantry path so don't force anyone to do something they're not good at. Don't be a dick either, or you'll lower your teams morale making their performance unacceptable. "When you die, get a X" is a great way to gather people for a rush. Always good to have a Plan B and it's natural. I assure you, you won't disturb players on the field for doing so. Remember! PUGs are completely different from public games! You can always command in public games to learn or get a head start, but the experience is going to be different. Well, that about does it for this guide. Congratulations for reading all of it, and I hope it helps you in commanding! If you any questions, be sure to contact any of the PUG Organizers/Moderators if you need assistance. We will try our best to help you so don't be afraid to ask. Join the Official TA Discord Server here: >>> Click me! <<< Join the Constructive Tyranny Discord Server here: >>> Click me! <<< PUG - Ultimate Infantry Guide ——— n/a PUG - Ultimate Tanker Guide ——— n/a PUG - Rocket Rush Spots Galore! ——— n/a PUG - Ultimate Base Defender Guide ——— n/a Xeon's Old PUG Commander Guide ——— >>> Click me! <<< PUG Crate Changes ——— >>> Click me! <<< Jay's Keybinding Tutorial ——— >>> Click me! <<< As always, - Jay

6_18_20239_11_57PM.thumb.png.ebcbed860729430051f4aa7cdd6660f1.png)


- 1 reply
-
- 2
-

-
- commander
- renegade x
- (and 2 more)
-
This post is intended to guide new commanders through the process of stepping up to command in a PUG and to give some general tips on commanding effectively. More detailed information about typical gameplans can be found in the PUG Meta Report. Linky. IMPORTANT GENERAL TIPS >>PLEASE READ THIS<<: Use your map! Get it on a keybind you can easily press. This is BY FAR the best way to get information on the battlefield. I have mine on ‘Z’ for example. Building kills are not the only way to cripple the enemy. Economy and Veterancy are important snowballing advantages for your team. FOCUS THE FUCKING HARVESTER! This is often the most important early game objective which can on some maps literally determine which team wins. Cruise Missiles are trash against PUG players. You’ve got some 20 people in voice chat. At least one of them is gonna call it out. Use EMP strikes if you need to push enemy tanks back. Early game all-in meme rushes are all-in. No shit. One team is going to have a bad time. Don’t expect moderators to rebalance the teams if it does or doesn’t work out. There’s usually a moderator on each team. If you want a break from commanding, you can ask them to take over for you. PRE-PUG: Let a PUG moderator know that you want to command. We’ll usually then ask you to select a couple players to join you. This is normally between 1 to 4, depending on player count. You don’t need to worry about picking strong players – the moderators will try to ensure teams are equally as strong. For the same reason this means we might deny some choices however! HIGHLY RECOMMENDED : Before the matches start, assign a dedicated defender and someone to take the commander powers if not yourself. Defender is the person in charge of mines – they may or may not camp base. Player with commander powers should always be with the main tank force unless rushing. EARLY GAME ROLLOUT: Organise early game rollout plans as players load in. This is normally done by spawn locations, but sometimes individual players are called out for tasks. Try to repeat in chat if you have time. i.e: PP/REF -> DEF HARV, BAR/WF -> ATK HARV Your priority one objective for early game is to get economy advantages. Kill and defend the harvesters and try to capture the silo if one is present. Monitor the spread of the team on your overview map as you begin to move out. Make sure you have at least one player on every route. Call out if you need to shift more players from one area to another. This is the prevent early rushes and infiltration catching you by surprise. Early game rushes here can be VERY RISKY, especially if you don’t use free infantry. Have a solid game plan if you want to do this. Depending on the map and your economy, call out the types of Tanks/AT to rollout with to contest the field. The default is Medium tanks for GDI and Arty/Lights for Nod. GDI in particular might need to rollout with Gunners or donate for Mediums if they lose their harvester. MID-GAME: Focus on getting field control for veterancy and economy advantages. This will make your team stronger and reduce the risk of rushes. If you completely have field control, consider gathering vehicles/infantry together to buff and kill a building. Make sure that your team has enough of an economy/veterancy to retake the field afterwards. If you completely lose field control, consider breaking out with a buff or consider trying a low player count rush. Make sure you have enough players to defend when you rush – you will not win in a base race with enemy tanks right outside your base. LATE GAME: Farm VP for heroic and attempt rushes. Rushes vary a lot depending on the map and buildings remaining. Ask your team for suggestions if you need ideas. It’s probably some rocket soldier rush though. COMMANDING TIPS: REPETITION! Repeat your orders. Hearing a single order is hard in a loud channel. Hearing the same order repeated 10 times is a lot easier. “When you die, get X” is a great way to get people for a rush. It appears natural and you won’t disturb players on the field this way. Assign your targets before every rush or push. Announce commander buffs before you use them. Let your team know when to push. Don’t underestimate Defensive buffs. The EMP immunity is incredible for breaking past enemy anti-tank infantry.
-
LAST UPDATE: 03/07/2020 This post is intended for new commanders or players to better understand what tends to happen in PUG matches. This is: NOT THE ONLY STRATEGY NOT THE BEST STRATEGY NOT MY OPINION NOT WHAT HAPPENS IN PUBLIC GAMES …Probably not the worst strategy? After the “standard strategy”, the map goes by order of least “standard-like”. @Readers : Let me know if you guys want more detailed map-specific information. I’ve been intentionally sparse to avoid throwing my opinion here. THE STANDARD STRATEGY: Early game: Focus economy gains. Defend and attack harvesters at the start. GDI’s harvester is generally more valuable to save/kill than Nods'. Capture Silo. Then focus other tech buildings. Watch out for any early rushes. GDI rollouts with Medium tanks and Nod with Arties and a few Light tanks. Mid game: Focus on crippling enemy economy and gaining veterancy advantages. Kill enemy vehicles and their harvester. Try to secure enough field control to hit enemy buildings for VP. Poke around the enemy team’s defences and look for opportunities for rushes. Late game: Farm VP for Heroic and try rushes. Elite rocket soldiers are a classic option. WALLS: ISLANDS: WHITEOUT: ARCTIC STRONGHOLD: OUTPOSTS: EVERYTHING ELSE: For the most part, all other maps follow the standard strategy.
-
Let me preface this by saying it's perfectly fine to never get out of your vehicle as a rule of thumb, especially if you're a newer player who is still getting to grips with tanking in Ren X. However until you're able to argue the exact reasons for and against your actions you'll never be truly efficient. This post looks at some of those arguments and is intended for the more experienced players who are looking to further optimise their tanking. (Its basically a risk assessment, but with tanks.) Lets consider the basic reason why players advise not to get out of their vehicle. Vehicle might get stolen if empty -> Don't exit vehicle While this certainly solves the problem, it assumes the worst for all scenarios. Instead consider: How often is there a enemy nearby capable of stealing your vehicle? How much are you actually losing if it does get stolen? How much are you gaining if decide to get out anyway? If you can answer those three questions with "Often"/"A lot"/"Not much" then its clearly a terrible idea to get out. On the other hand, if you can in some way change those to "Unlikely"/"Not much"/"A Lot" then it wouldn't be entirely crazy to take the gamble to get out. Lets consider how to effect these questions. Risk reduction : "How often is there a enemy nearby capable of stealing your vehicle?" On Nod: Usually not very high. The only way GDI is able to steal your vehicle is to either kill you or walk up in plain sight. Still, its possible to reduce the chances further. Stay close to your vehicle to quickly re-enter to prevent death from most automatic weapons. Assumes you have enough health to react. Keep moving & use your tank as cover to reduce chance of death from one-shot. Constantly look around your tank to prevent chance of enemy sneaking up on you. Pretty obvious stuff, but it gets more interesting on GDI's side. On GDI: All risks and reductions on Nod's side also applies to GDI. In addition, we also have to consider SBHs. So, how close are SBHs to your tank usually? Well, we don't know. BUT! We do know that they aren't immediately around your tank since they'll be visible. This small distance gives us some crucial leeway in controlling the SBH risk. Only exit your vehicle for a VERY short amount of time (<3 seconds or so) so SBHs won't have enough time to react and run up to your vehicle. Shoot the ground next to you randomly so SBHs keep their distance. All risk reductions of Nod applies to GDI as well. Remember that you don't need to do everything all at once. Keep your exits short but often to maximise your efficiency. While isn't as necessary on Nod to have short exits, its not a bad idea to get in the habit of doing it anyway. Damage control : "How much are you losing if it does get stolen?" However much your tank is worth plus the damage the stolen tank causes. There isn't much too say about the price, but the damage the stolen tank can vary significantly depending on the scenario. All of this is secondary to the risk reduction section. If you cannot reduce the risk of it being stolen then consider these points to decide if it is worth exiting. Try to exit vehicles when next to superior allied firepower so they can react if it gets stolen. Don't be afraid of leaving fragile and low cost vehicles. Avoid leaving high-tier vehicles. Be less afraid of the consequences the lower health you have on your tank. A tank that is about to die poses almost no danger to your team. Maximising gain : "How much are you gaining if decide to get out anyway?" There is a ton of different scenarios and infantry combinations possible for this, many of which I can't do (since I have trash aim) but there are a few to highlight. Repairing your tank: Many players will think of this as just restoring health points initially, but I think its important to instead think of this as "increasing the amount of volleys you can take". For instance, a recruit Sydney will deal 100 damage to a Arty per shot. In a 1v1 scenario, increasing your health pool from from 101 HP to 199 gives you ZERO GAIN. Increasing your health pool from 99 to 101 on the other hand will literally double your effective health. Its a massive difference in gain and if done correctly, can give you the edge to keep your tank alive in fights. (ASIDE: At minimum I suggest you should be capable of taking two volleys in a fight. e.g: A Arty should never expose themselves to a Mammoth tank when they have less than half health) Disarming MCT C4/Beacon: It should be pretty obvious but saving a building is considerably more valuable than losing a tank. This does NOT mean you should exit your vehicle each time though. Check your map first, if you can't see anyone else coming to assist you only then exit. Throwing EMP: This provides a relatively small tactical advantage. It is very fast however, so there's little risk in doing so. Specific examples: For sake of completion, here a few more examples of how all of this works together. EDIT: Video examples! Linky. Repairing a vehicle next to the Guard towers on lakeside: Chance of it being stolen (ignoring spies) is zero. Damage and gain don't matter in this case. Exit. Repairing a Mammoth tank in GDI base on Walls: There is a relatively low amount of risk of the tank being stolen, especially if you actively follow risk reduction. On the other hand, there's a fair potential for damage and you're gaining pretty much nothing. Maybe a few seconds of your time. Do not exit. Disarming timed C4 on a Humvee: There's a high chance of the Humvee being stolen since you'll be unable to perform short exits as effectively to disarm the C4 in time. You're not really losing much from getting out though. Its only a Humvee and it'll die anyway if you don't get out. On the flipside, even if you do disarm the C4, you're only saving a Humvee. Either choice though is acceptable. Personally would attempt it. Repairing a solo Veteran 350 HP MRLS with recruit timed C4 on it: Relatively low chance of the vehicle being stolen if you short exit and fire missiles around. Potential damage is fairly significant since you don't have allies to react nearby. You are potentially saving the vehicle if you repair beyond 400 HP though. Use short exits. Repairing a 100 HP Medium tank while being shot at by a Light tank with a second Medium tank ally nearby: There's a high risk of the Medium tank being stolen, as you won't be able to deter SBHs at all. However, since your tank is on low HP, the potential damage it can cause is very low - probably firing 1 or 2 shells at your ally before it dies. The potential gain is very high, as you might be able to save your tank by out repairing the Light tank. Furthermore, if the enemy Light is greedy, you may be able to bait them long enough for your ally to kill them. Exit. (The above scenario is one of the most impactful cases where you seriously consider exiting. Worst case it remains a 1v1. Best case its becomes a 2v0. This scenario can also be extended to other combinations of tanks.) Repairing a 500 HP Light tank while dueling a 700 HP Medium tank on Outposts: You can't use the Light tank as cover that well so there is a fair chance of getting sniped. There's a pretty large potential of damage if the tank gets stolen as well. You're not gaining much, only 1-2 extra hits. Do not exit. However consider exiting in cover or on lower health, especially if you can force the situation into a reverse of the scenario above. Leaving a Flame tank by GDI's entrance on Field, with enemy Havoc on sniper perch above and Barracks dead. High risk. high potential damage to allies. Potentially high reward if they fall for the bait. Either choice. I wouldn't risk it personally.

6_18_20239_11_57PM.png.cc7e61394f826cba3980120f564478b8.png)