Search the Community
Showing results for tags 'tutorial'.
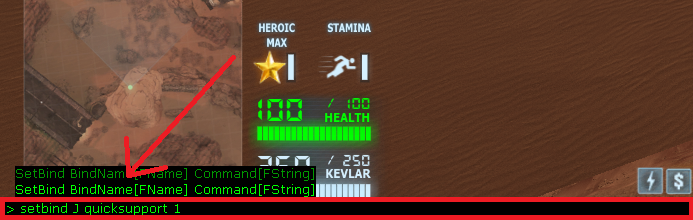
Found 4 results
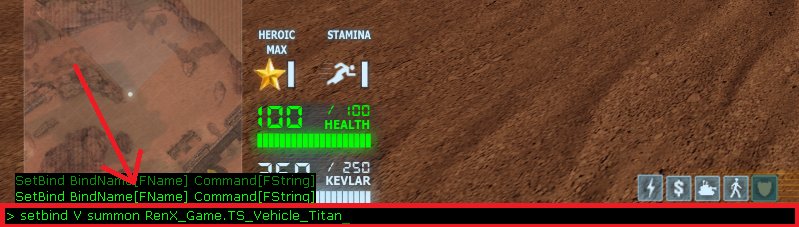
-
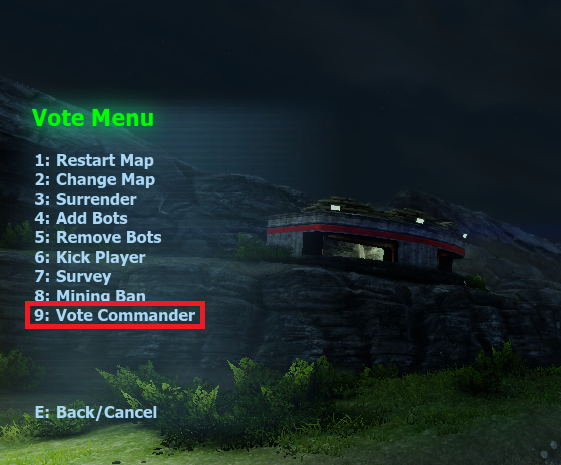
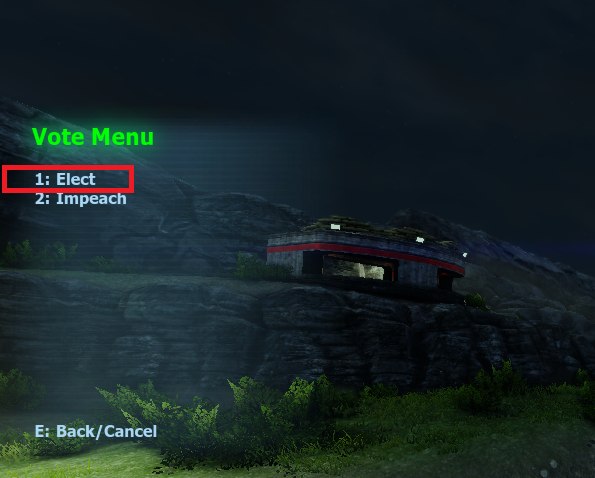
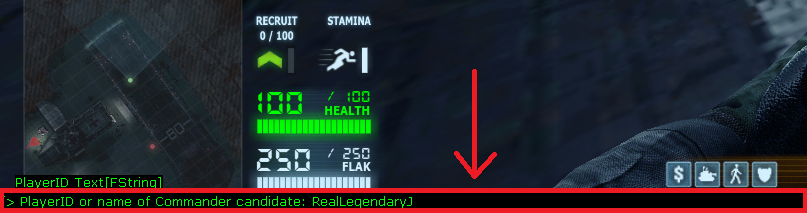
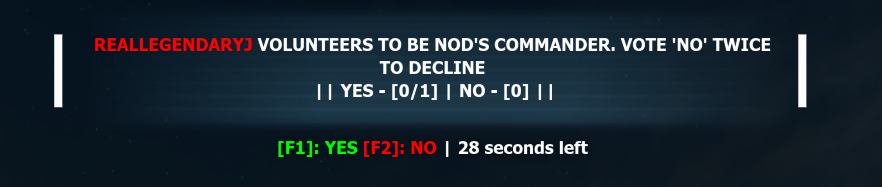
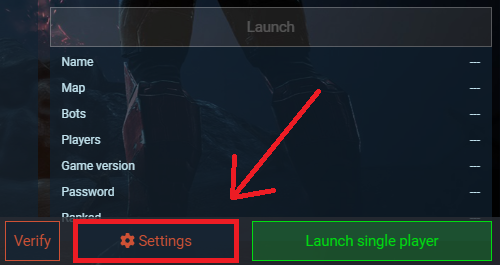
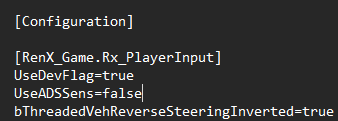
 WELCOME BACK, COMMANDER In today's topic, I'll be going over the complete package of setting up your keybindings for console commands, (commander) support powers, and other miscellaneous goodies. Lets dive straight to the point, shall we? Topic 1 How To Make Yourself Commander! ----- ⚠️ ----- It is important to note that while I em showing you how to make yourself a commander using console commands or the in-game vote menu, I will NOT be showing how to become a experience battlefield commander. If you want to know your role as a commander and like an introduction, it's best to ask in the official TA Discord or look in the wiki which I'll link here: https://wiki.totemarts.games/wiki/Commanders Option 1 1. First things first, let's make you a commander. The first option you have is using the in-game Vote Menu which has features that are easy and quick to access. To open the Vote Menu, on your keyboard press CRTL + V. 2. Once open, on the left side of your screen you should see the Vote Menu. You should see a list of options that range from restarting the map to voting a commander. The one we want to use is the Vote Commander option so on your keyboard press 9. Image from in-game Renegade X 3. From there it will ask you to Elect or Impeach, you want to press 1 on your keyboard to Elect yourself or someone you wish to vote in as commander. Image from in-game Renegade X 4. Since I'm using Skirmish, it will automatically put me as a commander. If you're trying this on a server, in the bottom left, it will ask you to vote somebody in. So in this case you will type your in-game name in there (or another players name if you want them as commander). Image from in-game Renegade X 5. Once you typed your name and pressed ENTER, a vote will appear on the middle-top of your screen telling the players in-game to vote you as commander. Ultimately if you change your mind, you can double press F2 on your keyboard and it will cancel the vote. Image from in-game Renegade X Option 2 6. Alternatively, the most easiest way of doing it is by using a simple command called: ----- ⚠️ ----- You must note: this only works if you are a administrator of the server (different for moderators) or in Skirmish. Please do not attempt this on the servers that you are not an administrator on. 7. To set yourself commander or somebody else, press F5 or / (forward slash) on your keyboard and a green and black box will open in the bottom. Type the command /setcommander then the players name and press ENTER. It will automatically skip the voting process and assign you or the player commander. Image from in-game Renegade X Topic 2 Setting Up Your Keybindings! -----💡----- Before we begin, I'm going to give you a list of (commander) support powers and console commands that will be important for you later down the line or whenever you need a refresher. Console commands will only work if you are a administrator in a server, Skirmish, or SDK Editor of Renegade X. Some commands will work in multiplayer servers. UDK Keybinds: https://docs.unrealengine.com/udk/Three/KeyBinds.html Support Powers Console Commands Vehicle List Weapon List Building List Once you memorized the commands or (commander) support powers you wish to use, let's begin on how to set them up onto a keybinding. Option 1 1. The first option you have is to set up your keybindings by going in-game and pressing F5 or / (forward slash) to open the command console. The command console will be a green and black box that will appear in front of you below. For faster results, make sure you're in a game or server to test out your functions. It is also important to note that you can overwrite your keybindings. Please ensure you don't make any mistakes or overwrite your W key and complain later that you can't walk anymore. 2. Once you have the command console open, in the console you want to type setbind then the key you want to bind, and lastly the command or support power you want bind. In simpler terms, like this: setbind <key> <command> So for example lets say I want to use the Radar Scan/Spy Plane support power and bind it to my J key, I would type setbind J quicksupport 1. Image from in-game Renegade X Below is a video better showing it if you're still confused. 💡 setbindtutorial1.mp4 "But Jay! I want to spawn a bunch of Titans without having to type it manually at the time! How do I set that to one of my keys?" ⚠️ (Just be careful doing that as you can actually crash yourself.) ⚠️ It's simple! Allow me to show you. 3. Once you figured out how the setbind command works, lets move onto the next level of summoning your favorite GDI walker tank: the Titan! To summon a Titan, in the command console you would type summon RenX_Game.TS_Vehicle_Titan. So lets say I want to summon Titans for my friends without having to type it manually all the time, and I want it bind to my V key. Here is what I would type: setbind V summon RenX_Game.TS_Vehicle_Titan. If you want a different vehicle, you would just type in a different line. Go back to the Vehicle List if you want to try out more. Image from in-game Renegade X Option 2 4. Finally getting the hang out it now, are you? Well lets move on to setting up your keybindings using the UDKInput file where all your configurations keys are located. -----💡----- First locate your install directory for Renegade X. If you don't know where it is, open up your TA Launcher and click on ⚙️ Settings in the bottom right. Once you open your settings, in front of you should show you where your install directory is, and of course you can change it anytime. Image from TA Launcher 5. Once you found your install directory double click on the UDKGame folder, then Config, and scroll down until you find UDKInput. Double click to open it and Notepad should open up. 6. Once you double clicked UDKInput and see Notepad open, scroll down until you find [RenX_Game.Rx_PlayerInput]. 7. If you scroll down further, you're going to see a bunch of Bindings= the further you go and go. Mainly, you want to find the bind you set your key to. In this case, it be easier to find the key such as ThumbMouseButton, J, V, or any key you set to. For me, mine are found way in the bottom above [RenX_Game.Rx_AuthenticationClient]. As you can see, mine are already set because I did them in-game. -----💡----- If for any reason your keybindings are not working in-game when you type them into the console, you always have the option to use the UDKInput if things don't go your way. Renegade X or UDK can be a bit finicky sometimes when doing commands in-game so it's always good to remember these sort of options. End As this tutorial comes to an end, I want to thank you for taking your time reading through this big ol' piece of information that might be useful to you now or one day. However you use this inforamtion, please use it responsibly. ----- ⚠️ ----- I em NOT responsible if you overwrite your existing keybindings! Please take caution and read through the information carefully! Put on your glasses (if you use them, that is) too! If you have any questions or concerns, feel free to comment below or on TA's Official Discord. I'll do my best to answer any questions you have. If any of the commands get changed in the future, I'll be sure to update this forum post. With that being said, I'll see you in the battlefield... Commander. - Jay

- 5 replies
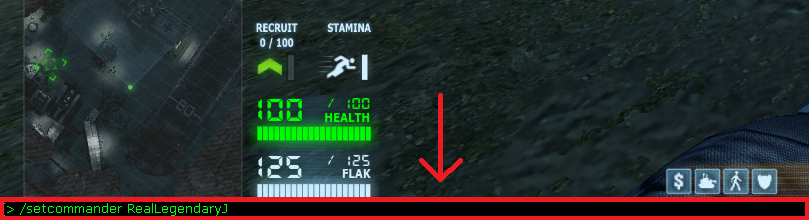
-
- 4
-

-
- configuration
- tutorial
- (and 2 more)
-
Hello fellow community members and map designers, I thought I'd share this with you. This is an advanced audio tutorial (see PDF) which helped me a lot with understanding and developing the sound environment in maps. I hope it'll help you with the stuff you're doing. It's quite something. As sound always gives the complete immersive experience, I'd highly recommend you read this Kind regards, Ruud The_game_Audio_Tutorial.pdf
-
Hey people, I've seen a lot of good maps already made by the community and a tonne of cool idea's. I often get the question what makes a good map in terms of gameplay (as the aesthetics can always be polished). I hope to give an answer to that by writing this forum post. I often see people starting with a really cool idea and immediately jumping into action by designing the level the way they have it inside of their heads inside the editor straight from the beginning. This is a thing I also did when I first started, but looking a back on how I did things, I should've done things differently, there are many improvements. I think it's better to have a solid plan for multiplayer gameplay functionality at first, so you can work out the aesthetics later on. As said before, I see many people working on the aesthetics of a map straight away, but most of the times this isn't really an efficient strategy. This is because when you have to change something around, you have to change a tonne of details which are very time consuming. In the very base of a multiplayer gameplay map I think its good to think about the objectives at first and the choke points. The PDF in the attachment here helps me explain a lot I can never write down myself here. Once you have done a basic layout of the map the way you want it to be, you can choose where to do what in terms of aesthetics. The most important thing here is that your map 'works' at first, so the details become less important. I'd highly recommend you read this before you start your own level because it'll give you a bit more grip on the gameplay and the way you design the paths. After you've read the PDF in the attachment, I'd also recommend to take a look at these sources: Work out your idea's, determine the atmosphere and scene; https://gamedevelopment.tutsplus.com/tutorials/a-beginners-guide-to-designing-video-game-levels--cms-25662 http://worldofleveldesign.com/categories/level_design_tutorials/how-to-plan-level-designs-game-environments-workflow.php Paths design, objective placement and distance; (this is mainly for singleplayer due to it's focus on lineair path design but you'll get the point) http://www.chaoticstupid.com/trinity-8-paths/ Objectives in RenX can for example be; A nice camping spot where you can MRLS / Arty pound the base (whiteout hill for ex) A tiberium silo A communications center A custom tech building Keep in mind that these are only examples, as the PDF in the attachment will say, it's best to have an objective with a function and after completing it's function (or after capturing) it should (almost) never be useful to say in. Arctic Stronghold was designed with these documents in mind, compared to the other maps it is a relatively new map but worked out really well from the start (compared to others which have +- 8 years of iteration behind them already) It's just an example of how things can turn out. I hope you can do something with this knowledge. Edit; Keep in mind that this sort of grabs the core essence of it all. There are far better books and advanced guidelines available (often you'd have to pay for them) but this is to get most community members in the proper direction. Multiplayer-Level-Design.pdf Kind regards, Ruud Edit2; For the users who are interested in the more advanced stuff; http://www.hourences.com/product/the-hows-and-whys-of-level-design-2/ http://www.hourences.com/my-2016-releasing-all-of-my-content-for-free/
-
Hey people, For the ones that are interested in investing lots of time into the perfect river / ocean / lake and water / snow / sand flow in general, here's you can create awesome normal maps and shaders, see the attachment. p.s. I've never actually used this myself but it looks really cool! So don't ask me for support. Water_Flow_For_UDK.zip